Loading... # iStoreOS 官网:[https://www.istoreos.com/](https://www.istoreos.com/) 官方文档:[https://doc.linkease.com/zh/guide/istoreos/](https://doc.linkease.com/zh/guide/istoreos/) 官方GitHub:[https://github.com/istoreos/istoreos](https://github.com/istoreos/istoreos) # Necessary preparation ## ESXi 请准备好你的ESXi,我使用的版本是ESXi6.7.0 ## StarWind V2V Converter 1. 从官网下载,但是要填写信息:[starwindsoftware](https://www.starwindsoftware.com/starwind-v2v-converter) 2. 也是从官网下载,但是是直链,无需填写信息:[starwindconverter.exe](https://www.starwindsoftware.com/tmplink/starwindconverter.exe) ## iStoreOS固件 [X86_64 EFI](https://fw.koolcenter.com/iStoreOS/x86_64_efi/)进入后选择一个Date比较新的进行下载,我使用的版本是`istoreos-22.03.6-2024030112-x86-64-squashfs-combined-efi.img.gz` 我这里选择的是iStoreOS的X86_64 EFI 固件进行安装,如有别的需求请从固件下载服务器上下载对应固件。 [iStoreOS固件](https://fw.koolcenter.com/iStoreOS/) # Official start ## Step 1 把下载好的`istoreos-22.03.6-2024030112-x86-64-squashfs-combined-efi.img.gz`解压出来,得到`istoreos-22.03.6-2024030112-x86-64-squashfs-combined-efi.img` ## Step 2 * 打开已经安装好的`StarWind V2V Converter`,选择Local file 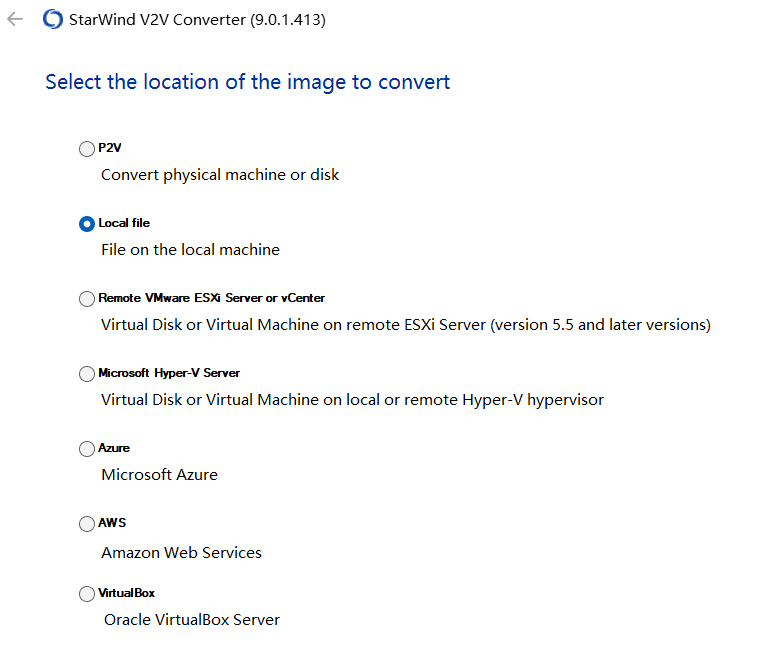 * 在Source image页面选择刚刚解压好的镜像文件 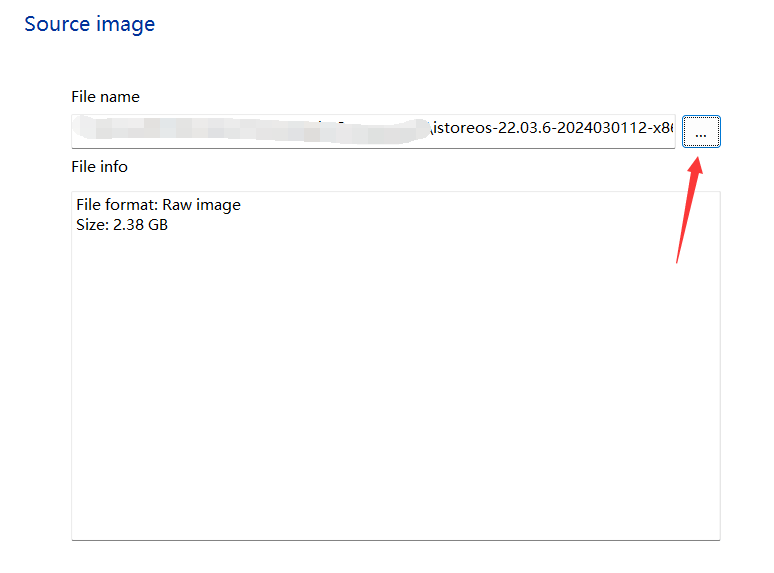 * 在Select the location of the destination image页面,如果你想将转换好的VMDK文件存放在本地就选Local file 如果你想直接上传到ESXi并且自动创建虚拟机的话就选择Remote VMware ESXi Server or vCenter。 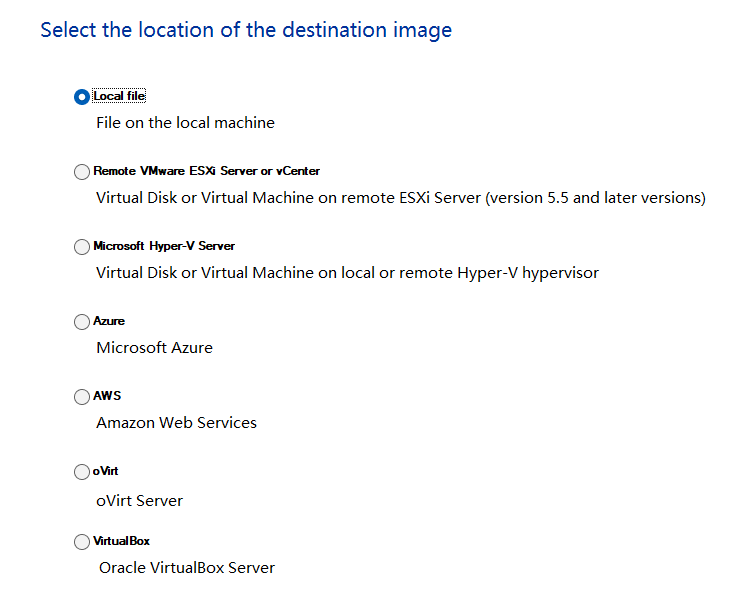 * 我这里选择Remote VMware ESXi Server or vCenter,这样比较方便,不需要二次上传,但是对于个别情况也可以选择Local file然后手动上传至ESXi。 * 输入ESXi的IP地址,账号密码。 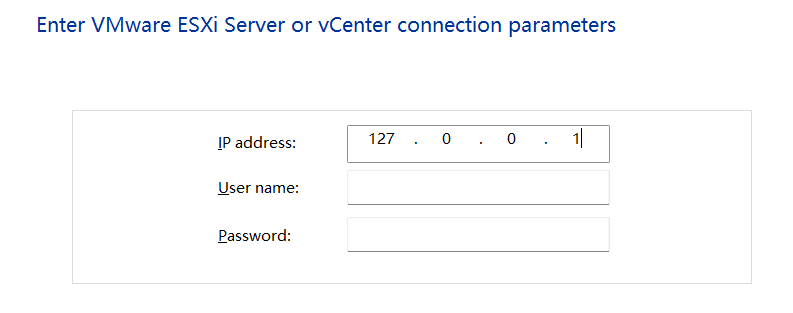 * 成功连接ESXi后选择Create a new virtual machine.在选项卡中Name、Path、CPU count、Memory, MB、Network connection都按照自己情况填写,Firmware type选择UEFI * 在Select option for VMDK image format选择ESXi pre-allocated image 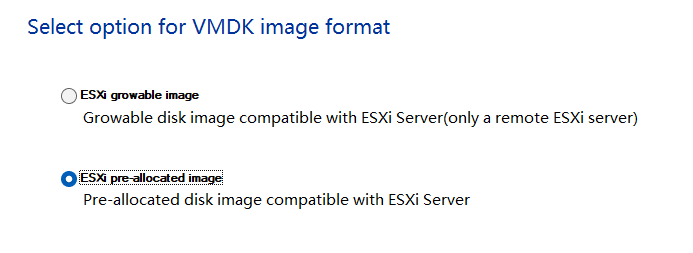 * 进入Set destination of image file中没有特殊需求默认即可,点击Convert,等待进度条到100% ## Step 3 * 进入ESXi,选择你刚刚在软件创建好的虚拟机,点击编辑,在虚拟机选项-常规选项中,将客户机操作系统版本设置为其他Linux(64位),引导选项中将启用UEFI安全引导的勾去掉。 * 开机!看到Boot Manager不要慌,选择Reset the system,然后就可以进入系统了。 如果Reset the system后还是进入了Boot Manager,应该考虑一下刚刚是否将引导选项中将启用UEFI安全引导的勾去掉了,如果没关闭UEFI安全引导的话,将虚拟机关机后进入编辑,将引导选项选择为BIOS,保存后再进入编辑引导选项选择回EFI~ 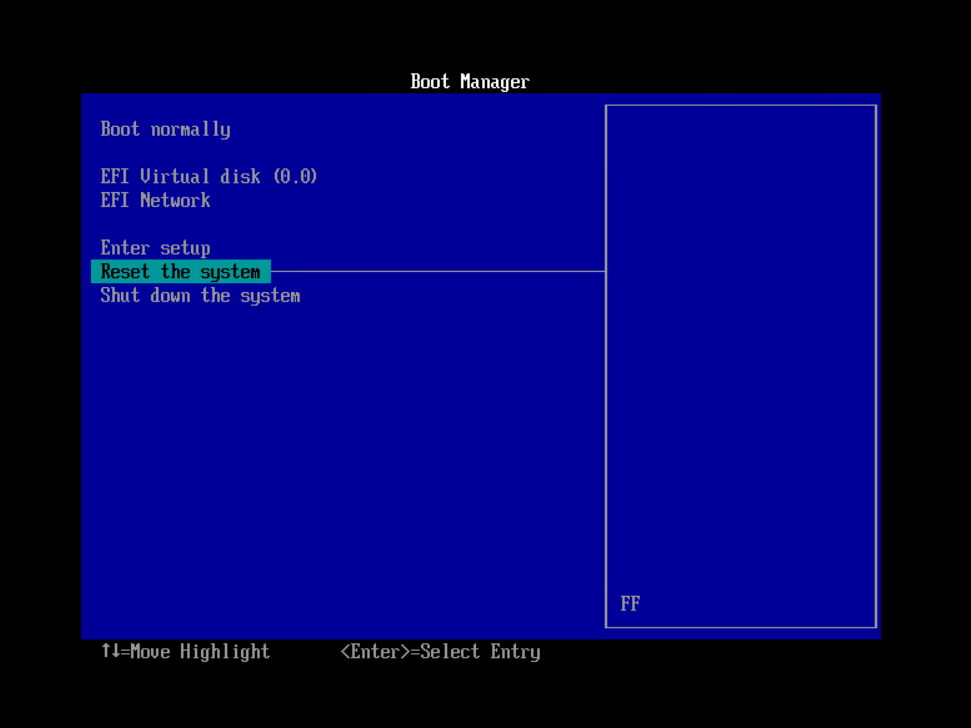 * 当画面出现Please press Enter to activate this console.的时候回车即可进入iStoreOS的控制台,这样iStoreOS就安装成功了! 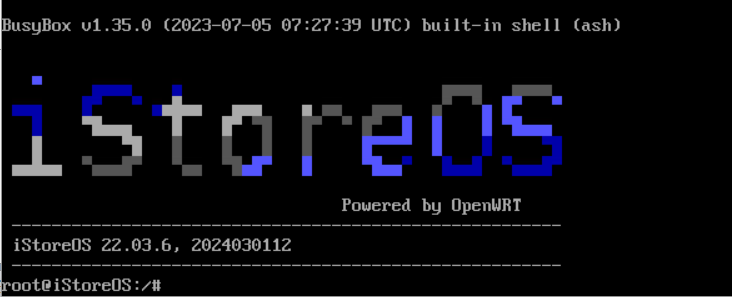 ## Step 4 ### 编辑网络 在进入iStoreOS控制台后输入`vi /etc/config/network`即可编辑网络配置文件,编辑完毕后按esc输入:wq退出并保存,重启虚拟机后即可生效。 ### 默认用户 用户名:root 密码:password ### 剩余配置 剩余的配置请大家跟着官方文档进行配置。 官方文档:[https://doc.linkease.com/zh/guide/istoreos/](https://doc.linkease.com/zh/guide/istoreos/) # Summarize StarWind V2V Converter经过了很多次的迭代更新,现在自动上传并且创建虚拟机的功能还是很方便的。 Thank you for reading and I hope this article was helpful! Please reply to me in the comment section for any errors or omissions in this tutorial, or you can send me an email. Last modification:March 13, 2024 © Allow specification reprint Support Appreciate the author Like 如果觉得我的文章对你有用,请随意赞赏
3 comments
怎么收藏这篇文章?
博主真是太厉害了!!!